Step 1: Create Your Season
This season, rosters in SportsEngine will be built in Season Management. Follow these steps to build your rosters and connect to your region and USA Volleyball.
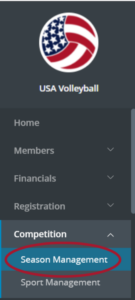
- Open the Competition Menu > Click Season Management > Click “ADD SEASON”
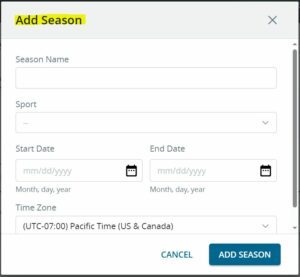
- Fill out season name, sport, start and end date, and click “ADD SEASON”
- You will create your own season which can give you a lot of flexibility. However, we recommend keeping it simple and creating one season for the entirety of your club season. This will allow you to build and manage all your club teams for the season in one place.
Step 2 Create divisions to help stay organized
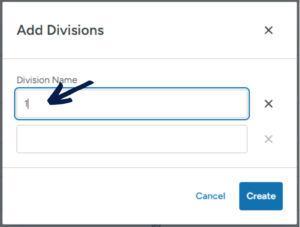
- Click “ADD DIVISIONS” > Begin to add your divisions
- Creating divisions in the division tab of your 23-24 season isn’t required but can help you stay organized and more easily message certain teams during the season. USA Volleyball recommends that if you are building rosters for a large club with multiple teams per age group that you setup divisions that match USA Volleyballs age groups and genders.

Step 3: Create your teams for the season.
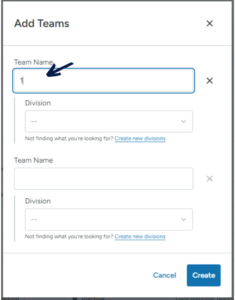
- Click “ADD TEAMS” > “Manually add teams” > Begin to add your teams
- When creating your teams, keep in mind that you will likely be submitting your teams to your region, so make sure you abide by any rules your region has for naming teams. Examples of this could include a club name or abbreviation in the team’s name, the age group of the team and an identifying label. For example, naming a team for our Demo club, Demo 16 National Girls so that it’s easy for the region to understand the details of the team based on its name.

Step 4: Rostering
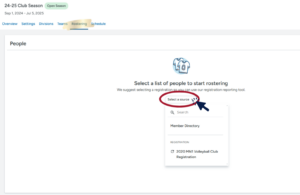
- When opening the rostering section, you will need to choose a source to find your players and staff you’d like to roster.
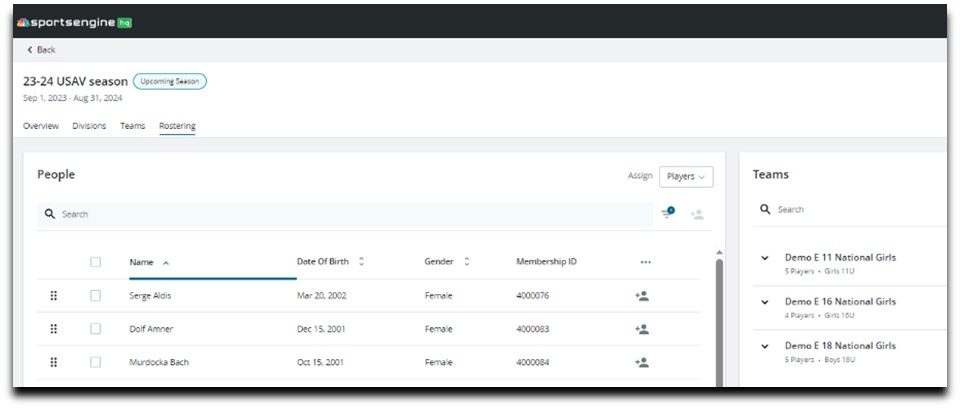
- In the rostering area, it’s important to note that there is an assign option that allows you to roster players OR staff. Please double check that you are only adding players when you have players selected and switch to staff to add your coaches and other staff members.

*See our Rostering the Right Profile section to help you filter and edit columns to help you find the correct player accounts to add.
- Once you’ve found the correct accounts simply drag and drop your players and staff into their teams
Step 5: Connect to USA Volleyball

- You can connect to your season after Sept. 1 at any time.
- After you build your rosters or make updates to them during the season, it’s important to submit those updates to USA Volleyball and your region.
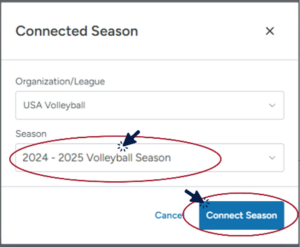
- The first time you connect to your season and submit rosters, go to the “Overview” tab and click the “CONNECT TO A SEASON” button.
- Choose 2024-2025 Volleyball Season and click “Connect Season”
- If you are updating your teams start with the “Teams” tab to share them.
- Click the check box of the team(s) you are wanting to share
- Then select the three-dot menu
- Scroll toward the bottom of the list and click “Share Teams”

- Be sure to add the rank of your team. This does not mean how qualified you think this team will be this season, this means in your club where does this team stand in this age group.

- Add the roles for your staff, scroll to the bottom and click “Share”
- You can also make changes to your roster after sharing your team with USAV.
- After a change has been made to your roster return to the team view and select review changes to resync your updates with the USAV official roster.
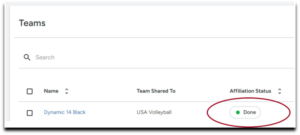
- To confirm your team has been shared successfully please check that Team Shared To says “USA Volleyball” and Affiliation Satus should say “Done” with a green dot next to it.
